
Change the name
- Click your profile photo (or your initials) at the top right.
- Click Profile.
- In the menu on the left, under Your business, click Your space.
- In Business name, type the new name. Up to 100 characters.
- Click Update. You’ll see “Name updated successfully”.

The business name, in Your space. The blue numbers are the steps.
Add or change the logo
- In Your space, click Add logo, in Business logo. You can also drag the image there.
- Choose a JPG or PNG image up to 12 MB.
- In Adjust image, fit the logo inside the square.
- Click Confirm. The logo saves on its own and shows at the top of your menu.
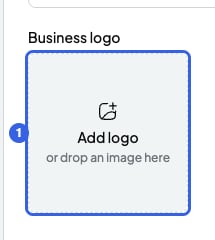
The logo, in Your space. The blue number is step 1.
Where the name and logo show
- At the top of the menu on the left and in the team switcher.
- In the student portal: on your portal’s page (“Classes with…”), when they log in (”…‘s student portal”), when they accept the invite and in their menu.
- The logo, on your bills and on the payments summary for your accountant. Bills don’t show the business name: they show your legal name, from Fill in your billing details.
- In invites to your team: the name in the email, and the name and logo on the page to join.
What you can’t do
- The teachers on your team can’t change the name or the logo. They see “Only the coordinator can change this.”
- Bills you already created keep their logo. Only new ones get the new logo.
- Bill emails don’t carry your business logo.