
Before you start
- The student needs an email saved in SmartCookie. If they don’t have one, add it: Add or import students.
- Your portal needs a web address (your link). It’s the same as your booking link, without
/bookat the end. - If you haven’t chosen it yet, SmartCookie warns you with “Set up your portal address first”. Choose it in Share or change your link.
Invite a student
- In the menu on the left, click Students.
- In the student’s row, in the Portal access column, click Invite.
- You’ll see the message “Invitation sent”. The Portal access column will show Invitation sent.
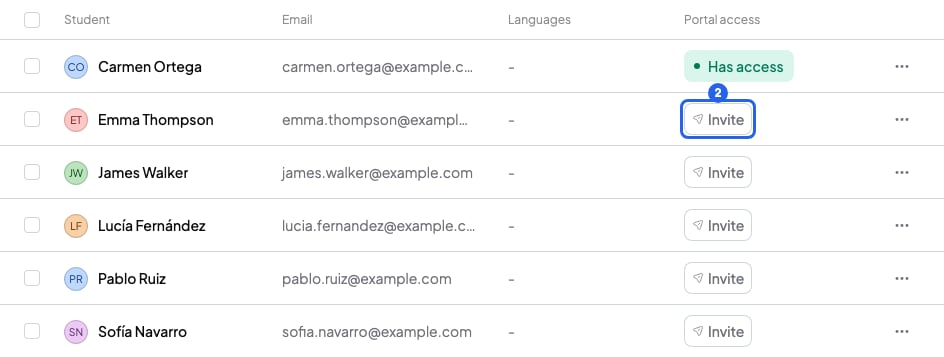
Student list with the button to invite to the portal
Invite several students at once
- In Students, tick the box of each student you want to invite.
- In the bar that appears at the bottom, click Invite / Resend.
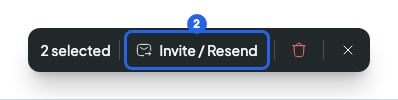
The bar that appears when you tick students
- Click Invite / Resend again to confirm. SmartCookie tells you how many invitations it sent and who it couldn’t invite.
What happens after you invite
- Your student gets an email from SmartCookie with the Create password button. Once they create it, the Portal access column shows Has access.
- The invitation expires after 14 days. The column then goes back to No access and you can invite them again.
- Can’t they find the email? Ask them to check their spam folder. If it’s still not there, click the three-dot button in their row, then Resend invitation. The previous link stops working.
- The email arrives in the language you have set in SmartCookie when you send it. If your student speaks another language, change it before inviting them: in Profile, Language card.
- To explain how to log in, send them Students: log in to your teacher’s portal.
Remove portal access
- In Students, click the three-dot button at the end of the student’s row.
- Click Revoke portal access.
- Click Revoke access. You’ll see “Portal access revoked” and your student can no longer log in. You can invite them again whenever you want.
What you can’t do
- You can’t invite a student without an email. Add their email first.
- Your students can’t sign up to your portal on their own. They only get in with your invitation.
- If the student’s email already has a SmartCookie account (for example, in another teacher’s portal), they can’t accept your invitation. Ask them for another email. Click their row in Students, change their Email and invite them again.
- If you delete a student, their portal access is deleted too: Delete a student.