
Before you start
- Decide on the course type, because you can’t change it later. If you’re not sure, read Which course type to choose.
Create the course
- In the menu on the left, click Courses.
- Click New course, at the top right. The New course panel opens.
- Type the course name where it says My course. For another color, click the color circle to the left of the name.
- In Course type, choose one of the 4 types.
- In Students, type a student’s name and click it to add them. Repeat to add more. In 1 to 1 lessons you can only add one. In Meetings 1 to 1 and Open doors, skip this step.
- Click Create. You’ll see “Course created successfully” and your course page opens.
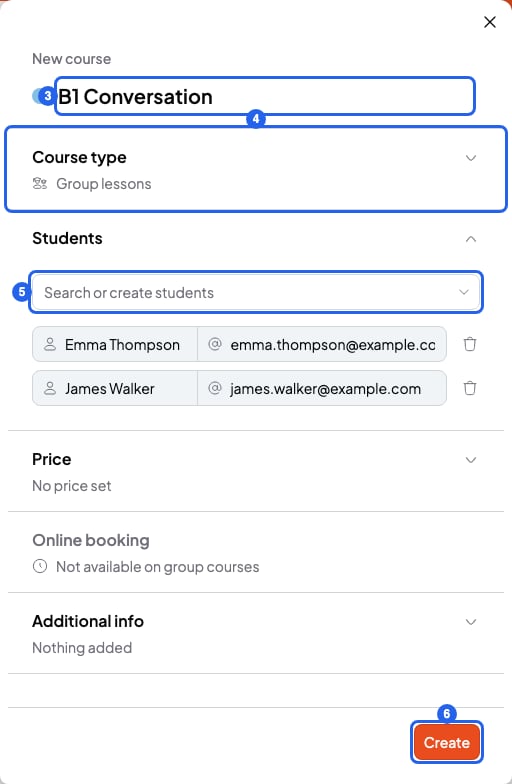
Panel to create a course
Fill in the rest (optional)
The panel has three more sections. You can leave them empty:- Price: what you charge, Per hour or Per month. In Group lessons it’s always per month. SmartCookie uses this price when you prepare a bill.
- Online booking: whether your students can book sessions from your booking link. In 1 to 1 lessons it’s on from the start. We explain it in Let students book sessions.
- Additional info: a Description (up to 500 characters), the Level (up to 20) and the Schedule (up to 100), for example “Mondays and Wednesdays”.
Change a course
- In Courses, open the course.
- Click the pencil (Edit course), at the top right.

The course buttons, at the top right
- Change what you need. If you change the price, pick the day the new price starts in Apply changes from.
- Click Save changes.
Delete a course
- In Courses, open the course.
- Click the bin (Delete course), at the top right, next to the pencil.
- In the window, click Delete course. You’ll see “Course deleted successfully”.
What you can’t do
- You can’t change a course’s type. Create a new course with the right type.
- You can’t use a name longer than 50 characters.
- You can’t get back a deleted course. Deleting it removes its sessions and notes. Your students stay in Students.