
Change your name and photo
- In Name and photo, type your name in Name.
- Click Update. You’ll see “Name updated successfully”.
Change your email
This is the email you log in with. The one your students see is changed in Fill in your billing details.- In Your email, type the new one in Email.
- Click Update.
- Open the email sent to your new address and click Verify Email Address within 1 hour. From then on, you log in with your new email.
Change your password
- Click Security to open the form.
- Type your Current password.
- Type the new one in New password: at least 8 characters, with 1 lowercase letter, 1 uppercase letter and 1 number.
- Type it again in Confirm password.
- Click Update. You’ll see “Password updated successfully”. You’re logged out on your other devices.
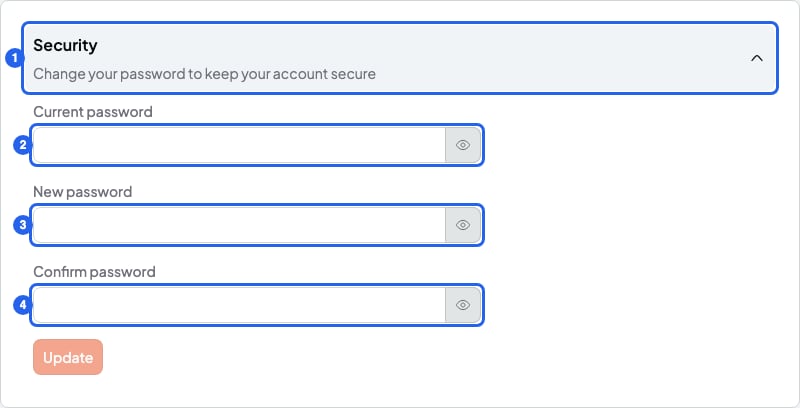
The Security form
Turn on multi-factor authentication
When you log in with your password, SmartCookie will also ask for a 6-digit code from an app like Google Authenticator or 1Password. Before you start, install a code app on your phone, like Google Authenticator (free).- In Multi-Factor Authentication (MFA), click Enable MFA.
- Type your Current password.
- Click Continue. You’ll see a QR code.
- Scan it with your app.
- Type the code from the app in Verify the code from the app.
- Click Enable MFA. You’ll see “Multi-factor authentication enabled”.
Link your Google account
This lets you log in with the Google button. If you connected Google Calendar, it’s already linked.- In Authentication, click Link Google.
- Choose the Google account with the same email as your SmartCookie account. You’ll see Google and the date.
Change the language
- In Language, click the dropdown showing your current language, for example English.
- Choose Spanish. The change is instant.
Change your time zone
SmartCookie takes it from your device when you create your account. It’s used for your calendar, your availability and the time your reminders and scheduled bills go out.- In Timezone, click the box and type your city, for example
Madrid(for the Canary Islands,Canary). - Choose your zone in the list. It saves on its own: you’ll see “Timezone updated”.

Your time zone, in Profile
What you can’t do
- You can’t create a password if you only log in with Google. Without one, you can’t turn on multi-factor authentication either.
- You can’t change your email to one another SmartCookie account already uses: the confirmation email won’t arrive.
- You can’t unlink Google if it’s your only way to log in.