
Before you start
- Fill in your billing details: Fill in your billing details.
- Your course needs a price before you can charge for its sessions: Create a course.
- If you want students to pay by card: Take card payments: connect Stripe.
Open a new bill
- In the menu on the left, click Payments.
- Click New bill, above the list of students.
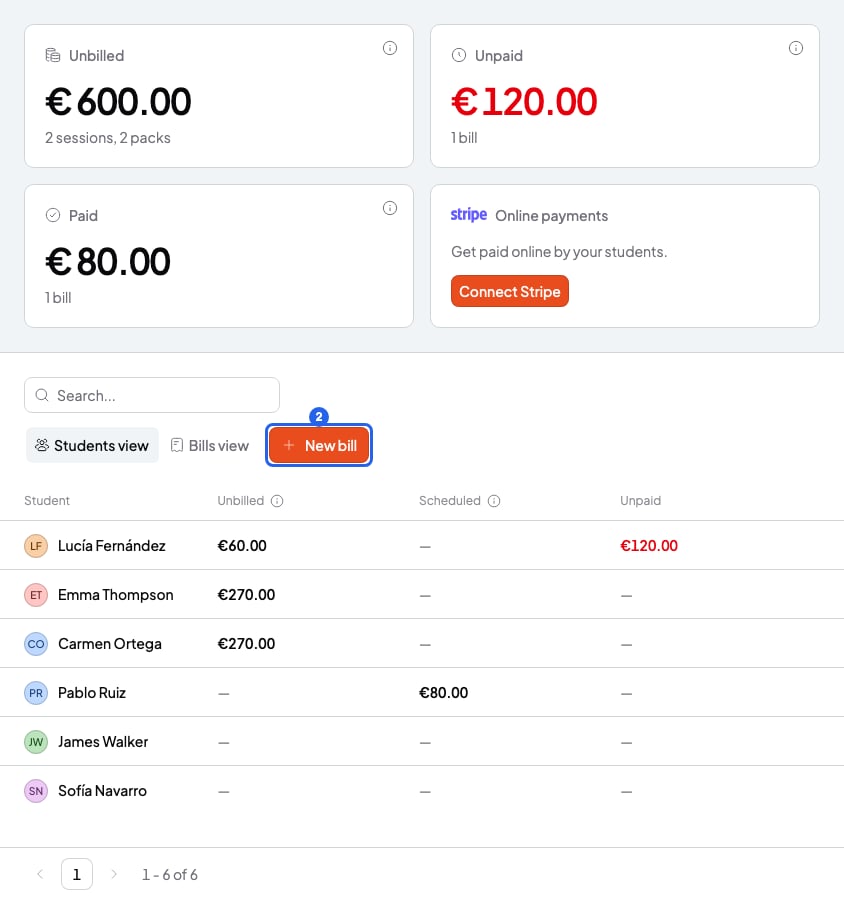
The Payments page
Fill in the bill
- In To, choose the student.
- Tick the sessions and packs you want to charge for. You see this month’s; to see other dates, click Billing period.
- To charge for something else, click Add and type the description, quantity and price.
- To give them a deadline, choose a Due date: No due date, 7, 14 or 30 days. If it passes without payment, the bill shows as Overdue.
- Check the Total and click Create.
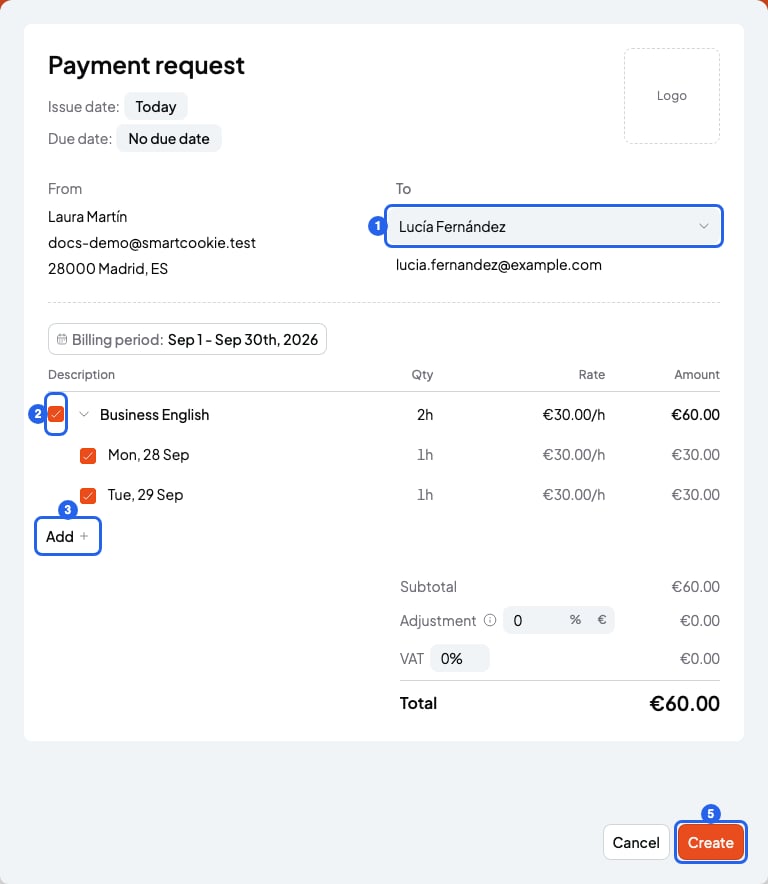
Form for a new bill
Send the bill
- In the Create this bill? window, leave Email it to (with your student’s name) ticked.
- Click Create bill. You’ll see “Bill created.” and the bill appears in Payments as Unpaid.
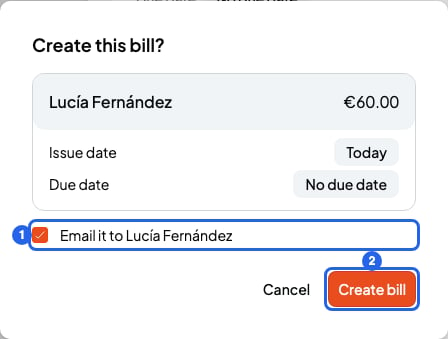
The window to confirm and send the bill
Schedule the bill for another day
You can create the bill today and have it sent later on its own:- While you fill in the bill, before you click Create, click Today, next to Issue date at the top of the form.
- Choose Next month (the 1st of next month), In 2 months or another day in the calendar.
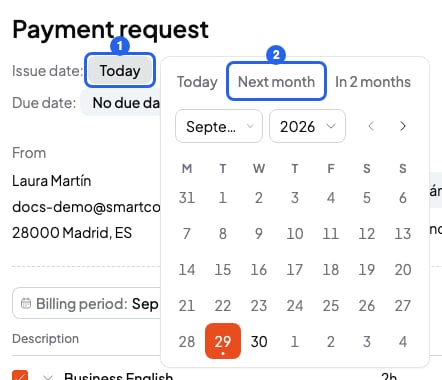
Choose the day the bill goes out
- The Create button changes to Schedule. Click Schedule, then Schedule bill. You’ll see “Bill scheduled.”
What you can’t do
- You can’t edit or delete a bill after creating it. Cancel it and create a new one: Mark a bill as paid or cancel it.
- A bill is not a tax invoice. If your student needs an invoice, you’ll have to make it separately.
- You can’t charge for the same session or pack twice.
- You can’t create a bill with a total below your currency’s minimum. It’s the smallest payment Stripe accepts, and it applies even if you haven’t connected Stripe: