
Create a pack
- In the menu on the left, click Courses.
- Open the course.
- Click Packs, at the top right.

The Packs button, on the course page
- Click New.
- Type a Name, for example “10-session pack”. Up to 50 characters.
- In Session count, enter how many sessions the pack includes.
- In Validity (days), enter how many days the student has to use them, counted from when the pack starts.
- In Price, enter what the whole pack costs.
- Click Create session pack. The pack appears in the Session packs list.
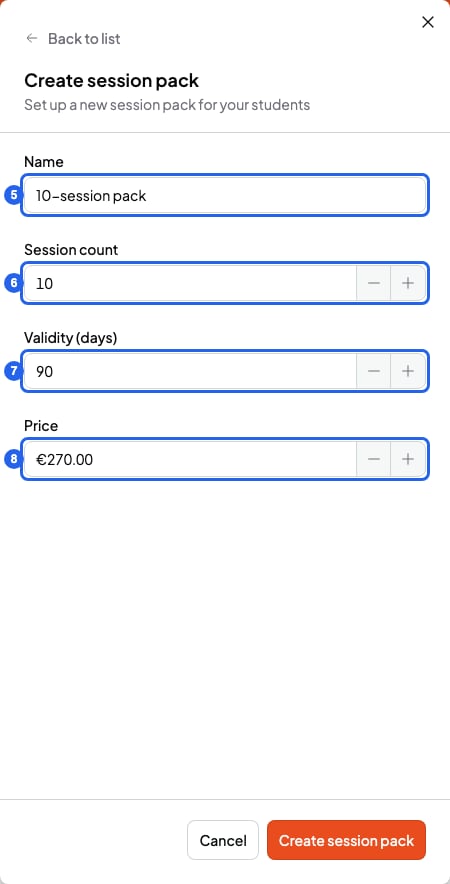
Form to create a session pack
Give the pack to a student
- In the course, click Packs.
- On the pack’s card, click Assign pack: the box-with-a-plus button at the top right. If the course has only one student, the pack is assigned straight away and you’re done.
- If the course has several students, tick who gets the pack. Students who already have one in that course show Active pack and can’t be ticked.
- Click Assign.
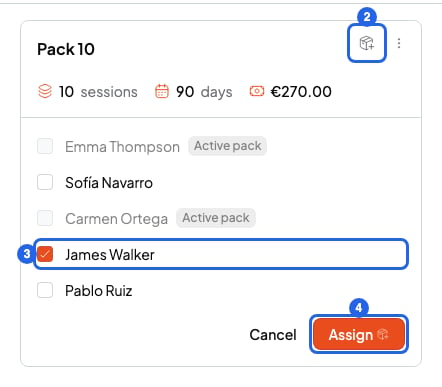
Giving a pack in a course with several students
Start the pack
The pack doesn’t count sessions until you start it. That way you choose the day it counts from.- In the course, open the Students tab.
- In the Session pack column, click Start pack.
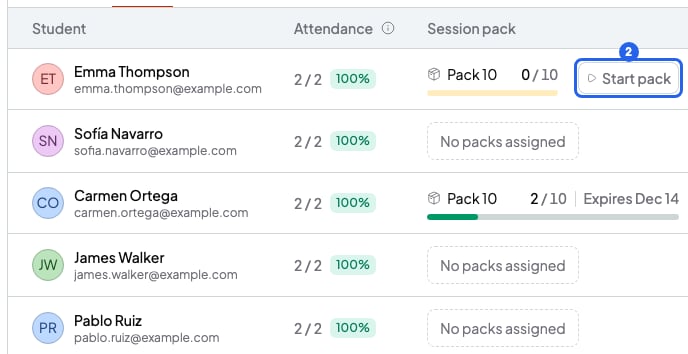
The Session pack column, in the Students tab
- Choose the Start date.
- Click Confirm. You’ll see a bar with the sessions used and when the pack expires. Which sessions it counts is in Track or remove a student’s pack.
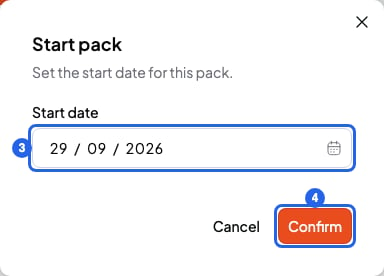
Window to start a pack
Charge for the pack
You can charge for it as soon as you give it, even before you start it. Create a bill for that student: the pack appears in the list with its price. Tick it to charge for it. Sessions the pack covers show In a pack and aren’t charged separately. The full steps are in Send a bill to a student.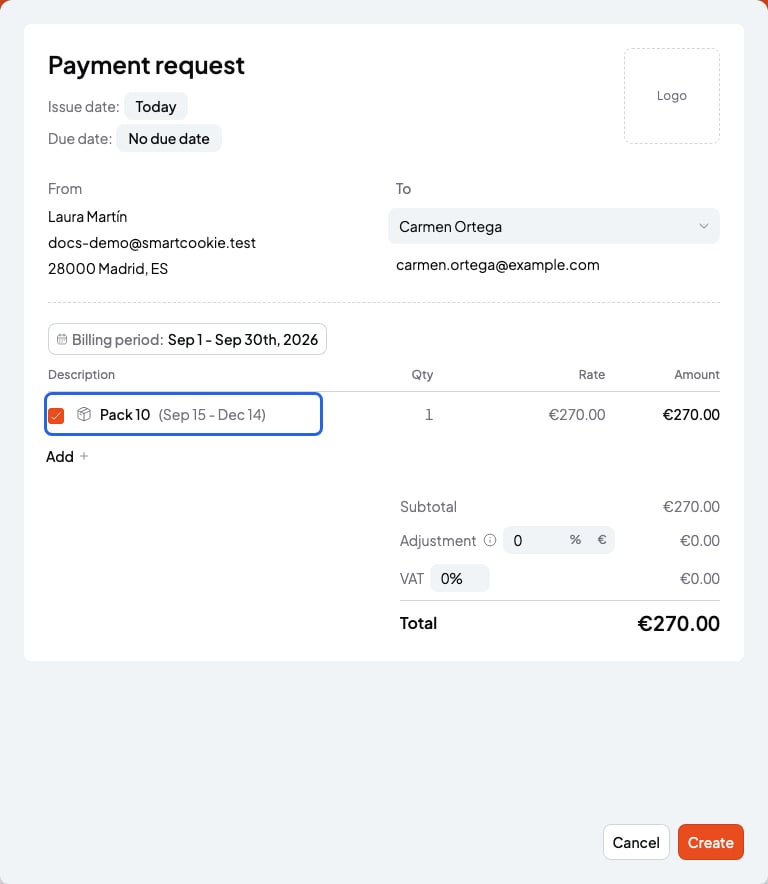
A pack on a new bill
What you can’t do
- You can’t give another pack to a student who already has an active pack (not started or in progress) in that course. Wait until it’s completed or expires, or remove it: Track or remove a student’s pack.
- If you edit a pack, students who already have it keep the old session count, validity and price.